Legend
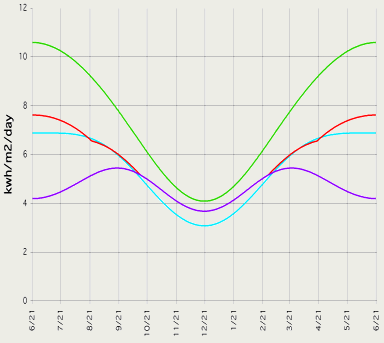
From top to bottom of graph:
| Green | Panels mounted on constant tracking mechanism. |
| Red | Panel angles modified twice yearly. |
| Turquoise | Panels mounted for best average over all seasons. |
| Purple | Panels mounted to make winter most efficient. |
This document is about mounting solar panels and discusses the influence mounting has on effectiveness including:
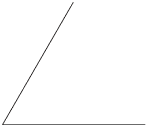
In this document, we're not going to discuss the second axis much because that requires more fussing or what are called "tracking panels." (See illustration at right.) We will mention this phenomenon when it comes up, however.
Panels that track the sun during the day can get 10% more sun in winter and 40% more in the summer. It's a great idea, but it's expensive to do. Here's why people want to do that:
Instead of tracking the sun, assume that you orient your panels toward dead south, or south plus a tiny bit west if you're next to mountains east or a tiny bit east if you're next to mountains on the west.
We're not writing this document for inhabitants of the southern hemisphere, but most of what's said here can be turned on its ear to work there too.
The reason this discussion is relevant is because of the sun's ever-changing...
Each morning, the sun is visible beginning in the east, then setting in the west. In the winter, in middle latitudes, the sun is much lower on the horizon than in the summer. Simply put, for most of us, the sun is almost directly overhead in summer, but in the southern half of the sky in winter.
From these facts, plus being told that the more nearly perpendicular the sun's rays strike a solar panel, the more energy is generated by it, you can easily understand that where and at what angle you mount solar panels can make a considerable difference in how much electricity you'll get out of them.
For example, in the graph below are four lines of different colors. Vertically (the y-axis) is the amount of power in kiloWatts per square meter of panel per day, the higher on the graph, the better. Across the graph (the x-axis) is the time of year beginning with the summer solstice (21 June) on the left and the winter solstice (21 December) in the middle. Nearer the summer solstice, when the sun is as directly overhead as it's going to be, the more sunlight will strike a panel lying flat on the ground. Nearer the winter solstice, the panel still lying flat on the ground, less electricity will be generated because the sun is at a much more oblique angle.
|
|
LegendFrom top to bottom of graph:
|
This graph doesn't map the panel lying flat on the ground, but at a fixed angle—set and left alone. The angle chosen depends on your latitude, but the panel is optimized for the best it can do... in:
Notice how the purple line never gets as high in the summer as the others, but dips less in winter too. Why would you wish to optimize for winter? Perhaps you're equipping a winter hunting cabin that's not used in the summer. There are practical reasons for choosing how to mount your panels.
Notice how the turquoise (light blue) line doesn't do as well in winter, but it does much better in summer. This is what your panels will do for you if you install them in place, at the appropriate tilt for your locale, and never touch them again, assuming you get them lined up for optimum elevation relative to the south horizon and angled toward the sun for its best time of day.
The angles given here, for summer and winter in the table below, are the number of degrees above horizontal and not from vertical. The way to remember this is that, at the equator, the best angle is flat on the ground. The closer to the poles you go, the more you tip them up from being flat on the ground. Therefore, if you live in Minneapolis, tip your panel way up to 60°:
...in the wintertime, but back down to only 21°:
...in the summer.
It's possible to adjust the tilt of both axes (continual adjustment of the panel all day long, every day of the year—what we call "tracking panels"). This is the green line. The more effort put into this, them more power you get out. The maximum effort would require a motorized, two-axis tracking mechanism that would be rather expensive.
However, there is a compromise, the red line. This means that 4 times per year, you readjust your panels to the best angles of elevation respective to the southern horizon and best (east-west) angle to get the sun's best moment of the day.
There is even a simpler compromise, with dimishing effect upon the power output, of twice a year adjusting your panels. It's up to you: fixed, twice per year adjustment or four times per year adjustment. Here are the tables.
This is an easy solution, but the calculations require a bit of arithmetic. Determine your latitude and...
| Degrees Latitude | Summer | Winter | Average insolation | Percent of optimum |
|---|---|---|---|---|
| 25° | 2.3° | 41.1° | 6.6 hours/day | 76% |
| 30° | 6.9° | 45.5° | 6.4 hours/day | 76% |
| 35° | 11.6° | 49.8° | 6.2 hours/day | 76% |
| 40° | 16.2° | 54.2° | 6 hours/day | 75% |
| 45° | 20.9° | 58.6° | 5.7 hours/day | 75% |
| 50° | 25.5° | 63° | 5.3 hours/day | 74% |
This wouldn't be so interesting, given the little bump in efficiency it creates, if it didn't illustrate a point. For twice a year, you actually use the position of the sun in the sky more nearly.
| Degrees Latitude | Summer | Spring/Fall | Winter |
|---|---|---|---|
| 25° | -1.3° | 22.2° | 46.3° |
| 30° | 3.3° | 27.1° | 50.7° |
| 35° | 7.9° | 32° | 55.2° |
| 40° | 12.5° | 36.9° | 59.6° |
| 45° | 17.1° | 41.8° | 64.1° |
| 50° | 21.7° | 46.7° | 68.5° |
If the angles seems a bit dodgy, it's because we're not saying everything. The angle of the sun isn't the same all day long.
Considering that the summer at 40° latitude would only be 16½° off direct overhead, it's odd that the table say to orient the panel to 12½°. This is because you have to consider the entire day: the sun rises more off the vertical in the morning and sets similarly off the vertical. It's only at noon that it's 16½° from being directly overhead.
If you're going to install panels on your roof, unless it's flat, you'll already have some slope to deal with and chances are it's not exactly the slope you want for your locale.
You'll find plenty of help on-line to figure out in construction terms—usually expressed as "rise over run," what the pitch of your roof is, 4/12, 6/12, 10/12, etc., but what angles does this represent?
The answer is a trigonometric problem involving arc-tangent. The formula is:
θ = arctan( rise / run )
Here's a ball-park illustration, however, degrees here are rounded to the nearest ½ degree.
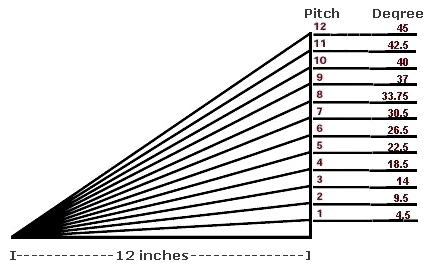
You can do this with many modern calculators, but if you're less than eager to mess with it, you'll find on-line sites with calculators you can use. You need to know your rise/run ratio, however.
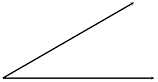
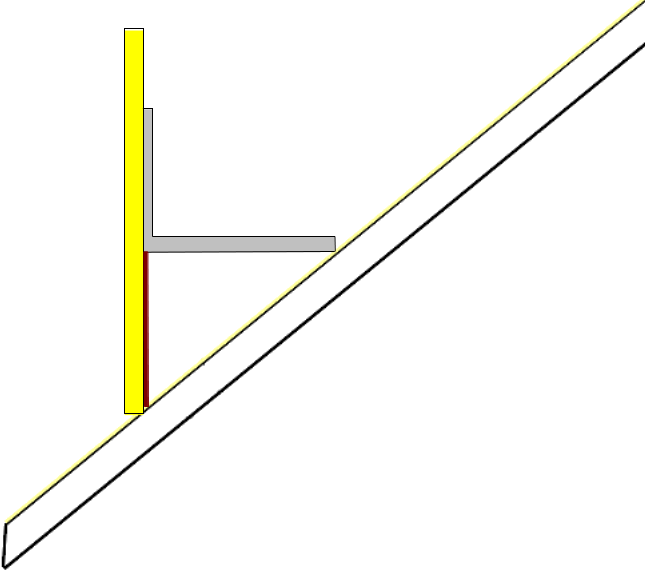
A roof's pitch is expressed as rise over run meaning the number units the roof rises higher over the number of units it spans. In countries where English inches are used, this is in inches, for example a shallow 4/12 only rises 4" for every foot it spans. A 45° roof (see previous illustration), which is pretty steep, rises 12" inches for every 12" inches it spans.
To determine your roof's pitch, you'll need four tools:
What you're looking to determine is the length of the red line in the illustration.
Refering to the illustration below, perform these steps:
Imagine, however, that your roof is already pitched and it doesn't match the final pitch needed by your panels. How would you decide the number of inches by which to pitch down (or up) your panels respective to the rail or other mounting system you're employing?
Draw a picture of your situation. For example, assume your roof's pitch is 7/12 and that, at your latitude, you need to mount your panels at 33.75° Because your roof's already pitched at 30.25°, you only need to make up an additional 3.5°, but how many inches is that?
Draw a picture of your situation. It doesn't have to be exact—just enough to give you an idea of the calculation you'll need to do.
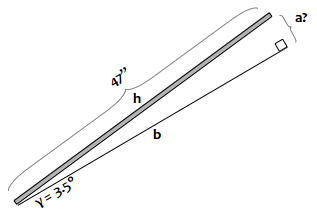
It's a trigonomety problem. Here, the single, bottom line represents the existing roof. We already know that the delta between the existing pitch of the roof (30.25°) and the final tilt of the panels (33.75°) is 3.5°. The angle of delta is noted as gamma here. The length of the panel is known also (47"). We'll treat the problem as if solving for the short side of a right triangle using what variables we know:
We don't happen to know the length of the base (b) of our triangle, but no matter, we just solve for a. But, how to use those knowns to do this?
The trigonometric equation we want to use, which we remember from high school is
sine2 + cosine2 = 1
Still we need to manipulate that equation to solve for the solution. We could go back to our books and scratch our decades-old memory or we could just use the notion of soh - cah - toa! This is a mneumonic device consisting of three different solutions (equations), all derived from the well known one just above, all leading to the discovery of one missing piece from two known pieces and we'll just pick the one we need based on our knowns. The syllables of the formula describe the knowns:
| 1. soh | sine( opposite angle ) / hypotenuse | a = sin( γ ) / length of hypotenuse |
| 2. cah | cosine( adjacent angle ) / hypotenuse | a = cosin( θ ) / length of hypotenuse |
| 3. toa | tangent( opposite angle ) / adjacent | a = tan( γ ) / θ |
Notes:
This trick is expressed in words relative to an arbitrary side which, in our case, we're calling a.
For completeness, let's point out that θ—the other acute angle from γ, is not shown in our problem, but it would be, if we cared, the angle adjacent to a up at the topmost end of the hypotenuse in our illustration.
sohcahtoa only works for solving the particulars of right triangles and not other kinds of triangles.
Of those, our knowns match the first pattern, sine( opposite ) / hypotenuse because we know the opposite angle (from side a) and the length of the hypotenuse. So, using a little algebra to transform the first equation above to get our answer:
a = sin( 3.5° ) × 47" = 2.9" [ sin( 3.5° ) = a / 47" → a = sin( 3.5° ) × 47" ]
To get the sine of 3.5°, we can use a calculator with sufficient transcendental functionality, look it up in one of those tables in the back of ancient math books, or just Google "sine of 3.5 degrees" in a browser.
(Incidentally, though we're not looking for them and don't really care, we can also get the base, b as well as also the other angle:
h     = cos( 3.5° ) × 47" = 46.9"   [ cos( 3.5° ) = h / 47" → h = cos( 3.5°) × 47" ]
86.5° = 180° - 90° - 3.5°           [ the sum of the angles in a triangle is 180° ]
.)
But, we have what we need, 2.9", so we know that we'll have to shim the top of the panel up by about 3"!